From Seed to Sprout: A Comprehensive Guide to Growing Perfect Brussels Sprouts
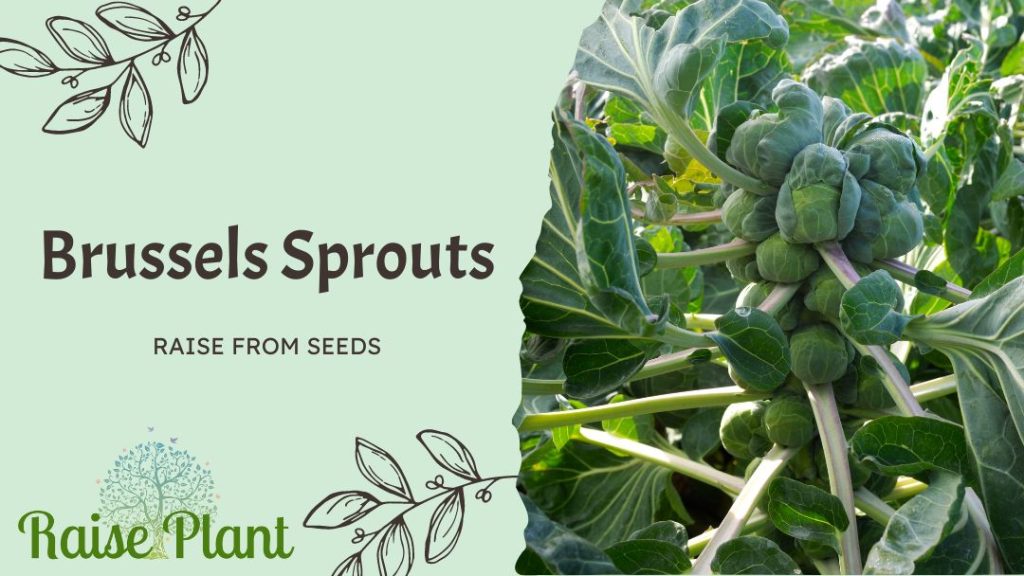
People all throughout the world have long cherished Brussels sprouts (Brassica oleracea, variety gemmifera), a little cabbage-like vegetable. originally grown in Belgium since the 16th century, these delicious and nutritious vegetables are now grown in many regions with suitable climates. With a more recent focus on organic and sustainable gardening practices, growing Brussels sprouts from seeds has become increasingly popular among home gardeners.
A Brief History of Brussels Sprouts
Around 400 years ago, Brussels sprouts were initially grown in what is now modern-day Belgium. The plant’s Latin name, Brassica oleracea var. gemmifera, reflects its classification as a member of the same family as broccoli and cabbage. Early cultivation of Brussels sprouts was concentrated in small areas of Northern Europe where they thrived under cooler temperatures and consistent rainfall.
The cultivation of Brussels sprouts rapidly spread throughout Europe and across the ocean to North America by the early 18th century. Today, fresh Brussels sprouts can be grown all year round in a variety of regions thanks to sophisticated farming techniques.
Benefits of Growing Your Own Brussels Sprouts from Seeds
Growing your own Brussels sprouts from seed has numerous benefits for both you and your community. To begin with, it is a cost-effective approach to consume fresh produce that is devoid of the dangerous chemicals found in produce purchased from a store.
Additionally, it gives you control over the growing conditions for your plants. Furthermore, growing your own food helps reduce your carbon footprint by minimizing transportation emissions while also supporting local agriculture if you choose to purchase seeds or supplies from nearby suppliers.
Gardening provides an opportunity for physical activity and stress relief while allowing you to connect with nature in a meaningful way. Growing your own Brussels sprouts can be an enjoyable endeavor that improves both your quality of life and your ability to put together meals, whether you are a veteran gardener or new to vegetable gardening completely.
Choosing the Right Seeds
Selecting the right variety for your climate and soil type
Selecting the right variety of Brussels sprouts for your climate and soil type is crucial to growing a successful crop. Some varieties are more tolerant of cold weather, while others thrive in warmer temperatures. Choose a cultivar with a speedy maturation if your area has a brief growing season.
If you have heavy clay soil, select a variety that is more resistant to diseases caused by poor drainage. It’s crucial to thoroughly study the information on the seed packaging before selecting which seeds to purchase.
Look for descriptions that match your growing conditions. For example, if you live in a region with cold winters and hot summers, look for seeds that are labeled as being heat and cold-tolerant.
Tips for purchasing high-quality seeds
Purchasing high-quality seeds is key to ensuring the successful growth and development of your Brussels sprouts plants. When selecting seeds, choose those from reputable companies that specialize in vegetable seed production.
These companies will often have been around for many years and will have developed strains of Brussels sprouts that are known to perform well. It’s also important to check the expiration date on seed packets before purchasing them.
Older seeds may be less viable and produce fewer plants than fresh ones. Consider purchasing organic or heirloom varieties if possible as those tend to produce better quality vegetables than hybrid ones.
How to store seeds properly
Proper storage ensures maximum viability when it comes time to plant your Brussels sprout seeds. Store them in a cool dry place such as a refrigerator or cellar until planting time approaches. It’s best not to store them in plastic bags because they can retain moisture which can lead to mold growth or damage from pests like rodents bugs etc., instead opt for paper envelopes or glass jars with tight-fitting lids.
Label each envelope or jar with the date and variety of seeds inside. Your seeds will continue to grow if you take these easy measures.

Preparing Your Soil
Before planting Brussels sprouts seeds, it is essential to prepare the soil properly. The preparation process can take several weeks or even months, depending on your soil’s health and quality. However, the time and effort put into preparing the soil can significantly impact your harvest yield.
Soil Preparation Techniques
Cleaning out any weeds and other trash is the first step in soil preparation. Pull out any visible weeds by hand or use a hoe to loosen them from the ground. Test the pH levels of your soil now that they are out of the way.
Testing Soil pH Levels
The pH range between 6.0 and 7.5 is good for producing Brussels sprouts. Any value less than 6.0 is regarded as acidic, and any value over 7.5 is alkaline. You can purchase a pH testing kit at most gardening centers or opt for more advanced digital testers available online.
Before putting seeds in the ground, you might need to add lime to the ground to gradually raise its pH level to around 6 over a duration of multiple weeks. If the pH level is too high (above 7), adding sulfur will help bring it down before planting.
Adding Organic Matter
In addition to adjusting your soil’s acidity levels correctly, adding organic matter like compost or aged manure can provide necessary nutrients that will benefit Brussels sprouts’ growth in many ways as they develop roots deep into the earth. You can work compost into the top few inches of soil using a garden fork or tiller approximately two weeks before planting seedlings outdoors or direct seeding them in rows outdoors when temperatures are consistently above freezing during springtime when there are no frost dangers.
Fertilizing Soil
Since Brussels sprouts need a lot of nitrogen, it’s crucial to fertilize the soil properly. Using a balanced fertilizer mix with higher nitrogen levels like a 5-10-10 or 10-20-10 ratio is ideal for fertilizing soil. Make sure you have added enough nutrients for the plant to use over the entire growth season by applying fertilizer in accordance with the directions on the box.
Best Time to Plant Brussels Sprouts
It’s best to plant Brussels sprouts seeds in early spring, around six weeks before the last frost date. If you missed that window, it’s still possible to plant Brussels sprouts later.
However, it will take longer and may impact your yield potential. The crucial aspect of planting is timing; plan ahead and prepare your soil for the best results!
Planting Brussels Sprout Seeds
Seed Starting Indoors:
If you live in an area with a shorter growing season, starting your Brussels sprout seeds indoors can give them a head start and result in a bigger harvest. To start your seeds indoors, fill trays or pots with a high-quality seed starting mix.
Sow one to two seeds per cell or pot, about ¼ inch deep. Keep the soil moist and place the tray or pots in bright light, such as near a south-facing window or under grow lights.
It should be between 70 and 80 degrees Fahrenheit (21-27 degrees Celsius) for Brussels sprout seeds to germinate. The seedlings require intense light for at least 12 hours per day once they have emerged.
If you’re using grow lights, keep them about 2 inches above the seedlings. After about four to six weeks, when the plants have grown their first true leaves, it’s time to transplant them outdoors.
Transplanting Seedlings Outdoors:
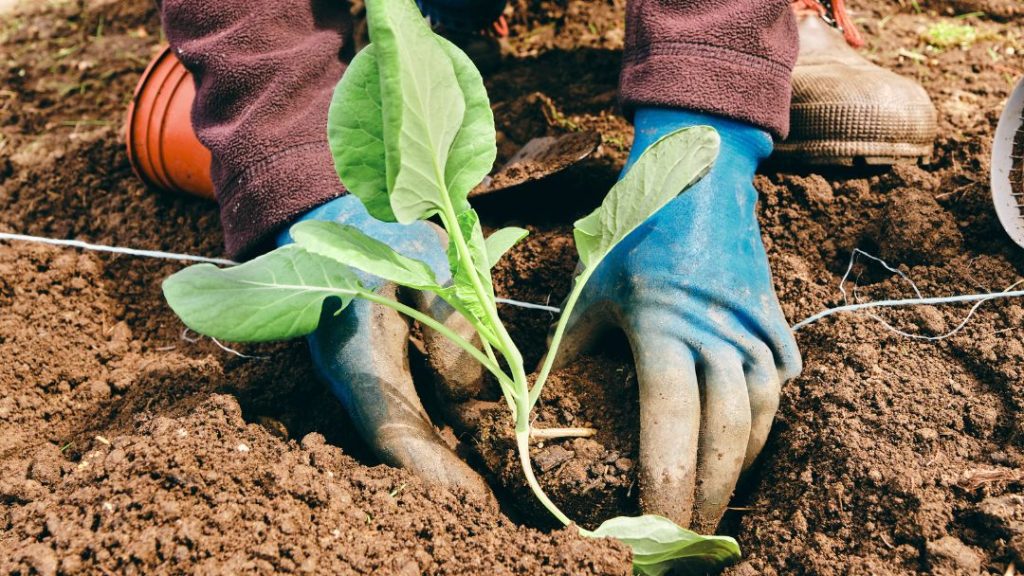
Before transplanting your seedlings outdoors, harden them off by gradually exposing them to outdoor conditions over several days. Choose a spot in your garden that obtains full sun, has well-drained soil, and a pH that ranges from 6 and 7. Dig holes that are slightly larger than the root ball of each seedling and space them about 18 inches apart.
Gently remove each plant from its pot and place it into its hole so that its base is level with the soil surface. Fill in each plant with soil and firmly press it down around the stem.
Direct Seeding Outdoors:
If you have a longer growing season and want to skip starting your seeds indoors, you can directly sow Brussels sprouts outdoors after all danger of frost has passed. Choose an area that receives full sun throughout most of the day and has well-draining soil with a pH of 6.0 to 7.5.
Sow your seeds about ½ inch deep, spaced about 2 inches apart. Cover the seeds with soil and firm them down gently.
Keep the soil evenly moist until the seeds germinate in about seven to 14 days. Protecting Young Plants from Pests and Weather:
Young Brussels sprout plants are vulnerable to pests such as slugs, aphids, and cabbage worms, which can quickly decimate your crop. To protect them, cover young plants with floating row covers or use organic pest control methods such as handpicking pests off plants or applying an insecticidal soap.
Additionally, Brussels sprouts can survive frost but not prolonged exposure to extremely cold temperatures below freezing (32°F). If a late frost is forecasted, cover seedlings with frost blankets or other protective material at night until the danger has passed to prevent damage from frostbite.
Caring for Your Brussels Sprouts Plants
Watering techniques and frequency
When it comes to watering your Brussels sprouts plants, consistency is key. The plants ought to remain completely dry, however, you also never want to overwater them anymore.
The soil should be consistently moist but not soggy. It’s important to water deeply and infrequently rather than lightly and often.
As a result, the plant’s roots will be encouraged to delve further into the ground in quest of water. It is advised that you water your Brussels sprouts plants about 1-2 inches per week when the weather is dry.
However, make careful to check the soil moisture level every day with a moisture meter or by inserting your finger about an inch deep into the ground. If it feels dry, then it’s time to water.
Mulching to retain moisture
Mulching around your Brussels sprout plants can help retain moisture in the soil and prevent weeds from growing. Organic mulches like straw, grass clippings, or shredded leaves work best because they break down over time and add nutrients back into the soil.
To mulch your plants, spread a layer of mulch about 1-2 inches thick around each plant’s base taking care not to cover any part of its stem or leaves as this could encourage rotting or insect infestation. Mulching will also help regulate temperatures in hot climates.
Fertilizing Schedule
To ensure strong growth and healthy yields for your Brussels sprouts plants, regular fertilization is essential during their growing period. Fertilizers rich in nitrogen can be applied every two weeks until midsummer when fertilizer application should be switched from nitrogen-rich fertilizer types like ammonium nitrate or urea-based types towards potassium-phosphorus rich fertilizers such as bone meal or rock phosphate-based types as these help improve the plant’s overall health.
Take care not to over-fertilize as this could lead to weak growth and imbalanced nutrient levels in the soil. Applying too much nitrogen-rich fertilizer is especially dangerous as it could lead to excessive foliage growth at the expense of sprout production.
Pruning and staking techniques
Because Brussels sprouts plants are frequently top-heavy, it’s crucial to support them by pruning and staking. This will help prevent wind damage or breakage at maturity. To stake your plants, drive a garden stake into the ground next to each Brussels sprout plant when they reach about 12 inches tall.
Securely tie the main stem of each plant loosely to their stakes using twine or string taking care not to damage any part of the plant with tight knots or pressure points. To prune your Brussels sprouts plants, remove any yellowing leaves or those that have insect infestations immediately.
You can also cut back some of the lower leaves, which will encourage growth up top where your sprouts are developing. In addition, pruning lateral shoots helps focus energy on producing quality sprouts instead of vegetative growth like leaves.

Harvesting Your Brussels Sprouts Crop
Timing is Everything
You’ll notice that the sprouts themselves have gotten to be around the size of a golf ball when your Brussels sprouts plants are ready to start harvesting. This typically happens around 90-100 days after planting (depending on the variety).
However, the years count when it comes to harvesting Brussels sprouts since when leaves are left on the plant for too long, the flavor can turn harsh. Watch your plants carefully and harvest as necessary.
Harvesting Techniques
To harvest Brussels sprouts, simply snap or cut off each individual sprout from the stem using pruning shears or scissors. Working your way up the plant, start at the bottom and only harvest what you need at that moment.
Be sure to leave enough of the plant intact so that future growth can continue. Remove any yellow or damaged leaves while you’re at it.
Storing Your Harvested Brussels Sprouts
Your Brussels sprouts should be rinsed under cold water after harvest, then dried with a towel. For up to two weeks, keep them in the crisper drawer of your refrigerator in an airtight container. For longer storage times (up to six months), consider blanching your Brussels sprouts before freezing them.
Conclusion
Growing your own Brussels sprouts from seed can be a rewarding experience that yields delicious results! With proper care and attention paid throughout each stage of growth, you’ll soon find yourself with an abundance of these nutritious mini-cabbages ready for harvest.
Whether adding them into stir-fries or roasting them up alongside some other veggies, there’s no shortage of ways to enjoy this versatile crop once it’s ready for picking! So roll up those sleeves and get started on growing your very own Brussels sprouts today!

