Discover the Proven Steps to Grow Elderberry from Seeds
To grow elderberry from seeds, start by stratifying the seeds in the refrigerator for 2-3 months. Then, sow the seeds in a well-draining potting mix, keeping them consistently moist.
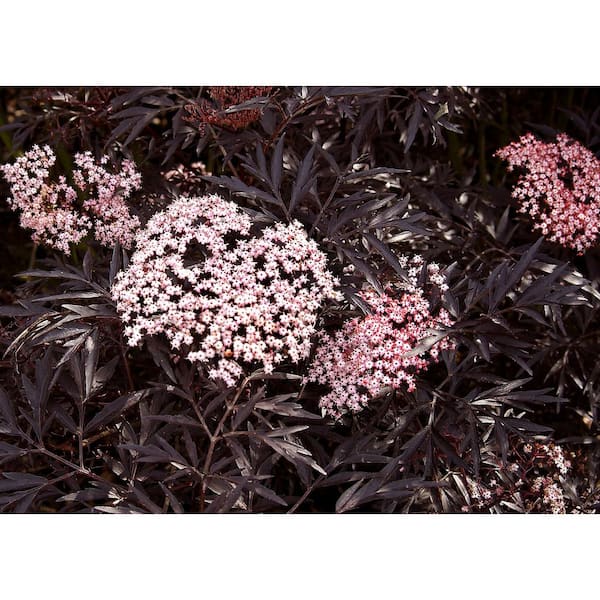
Credit: www.homedepot.com
Benefits Of Growing Elderberries From Seeds
Growing elderberries from seeds offers numerous benefits, including the joy of witnessing their growth and the satisfaction of cultivating your own homegrown berries for culinary and medicinal purposes. It’s a rewarding experience that allows you to enjoy the rich flavors and health benefits of elderberries straight from your garden.
Elderberries – A Nutritional Powerhouse
Elderberries are not only delicious, but they are also packed with essential nutrients that can greatly benefit your health. Here are some key reasons why growing elderberries from seeds is a fantastic idea:
- Rich in antioxidants: Elderberries are known for their high levels of antioxidants, which help protect your body against free radicals and reduce oxidative stress.
- Immune-boosting properties: Elderberries contain immune-strengthening compounds that can help ward off common illnesses like colds and flu.
- High vitamin content: These berries are a great source of vitamins a, b, and c, providing you with a natural boost of energy and supporting healthy skin and hair.
- Anti-inflammatory effects: Elderberries have anti-inflammatory compounds that can help reduce inflammation in the body and alleviate symptoms of arthritis and other inflammatory conditions.
- Heart health benefits: Regular consumption of elderberries has been linked to improved heart health, as they can help lower bad cholesterol levels and promote better blood circulation.
- Digestive support: Elderberries are rich in fiber, aiding in digestion and preventing digestive problems like constipation.
- Natural cold and flu remedy: Elderberries have long been used as a natural remedy for treating colds and flu. The potent antiviral properties can help shorten the duration of these illnesses.
- Weight management: The high fiber content in elderberries can help you feel fuller for longer, aiding in weight management and preventing unnecessary snacking.
- Versatile culinary uses: Elderberries can be used in a variety of ways, from making delicious jams and jellies to adding a tangy touch to desserts and beverages.
Cost-Effective Alternative To Buying Plants
Growing elderberries from seeds offers a cost-effective alternative to purchasing plants. Here’s why:
- Lower initial investment: Buying elderberry seeds is more affordable than purchasing mature plants. This allows you to grow a larger quantity of elderberries without breaking the bank.
- Increased harvesting potential: By growing elderberries from seeds, you have the opportunity to produce multiple plants, resulting in a higher yield during each harvest.
- Self-sufficiency: Growing elderberries from seeds gives you the satisfaction of becoming more self-sufficient by producing your own plants and crops.
- Educational experience: It can be rewarding and educational to start from scratch and witness the entire growth process, helping you develop valuable gardening skills and knowledge.
- Quantity control: By growing elderberry plants from seeds, you can control the quantity you produce, allowing you to tailor your harvest to your personal needs and preferences.
Start your elderberry growing journey today and enjoy the numerous benefits that come with it!
Step 1: Selecting Elders From Seed Sources
To grow elderberries from seeds, start by carefully selecting elders from reliable seed sources. This crucial step lays the foundation for a successful and thriving elderberry harvest.
Identifying The Ideal Elderberry Varieties:
Growing elderberries from seeds requires careful selection of the ideal elderberry varieties. Here are some key considerations when identifying the perfect elderberry varieties for your garden:
- Climate suitability: Ensure that the elderberry varieties you choose are suitable for your specific climate. Some varieties thrive in cooler regions, while others prefer warmer climates. Research the ideal growing conditions for different elderberry varieties and select ones that will thrive in your area.
- Purpose: Determine the purpose of growing elderberries in your garden. Are you planning to use the berries for culinary purposes, medicinal extracts, or simply to enhance your landscape? Various elderberry varieties offer different characteristics, such as flavor profiles, medicinal qualities, or ornamental features. Consider your specific needs when selecting the ideal varieties.
- Growth habits: Elderberry varieties can vary in terms of growth habits. Some varieties are compact and well-suited for smaller gardens, while others can grow into large shrubs or even small trees. Assess the available space in your garden and choose elderberry varieties that will fit well within your landscape.
- Disease resistance: Elderberries can be susceptible to certain diseases, such as powdery mildew or bacterial leaf spot. To ensure healthy growth, it is advisable to select elderberry varieties with good disease resistance. Look for varieties that are known for their resilience to common elderberry diseases in your area.
Choosing Reliable Seed Suppliers:
Once you have identified the ideal elderberry varieties, the next step is to find reliable seed suppliers. Here are some factors to consider when selecting a seed supplier:
- Reputation: Research the seed supplier’s reputation in the gardening community. Look for reviews or testimonials from other gardeners who have purchased seeds from the supplier. Positive feedback and a good reputation are indicators of a reliable supplier.
- Seed quality: Ensure that the seed supplier offers high-quality seeds. Look for suppliers who provide detailed information about the seeds, including their origin, germination rates, and any certification they may have. High-quality seeds are more likely to germinate and produce healthy plants.
- Variety availability: Check if the seed supplier offers a wide selection of elderberry varieties. It is beneficial to have options and choose from a range of varieties to suit your specific needs and preferences. A supplier with a diverse selection demonstrates their commitment to providing a wide range of choices.
- Customer support: Consider the level of customer support provided by the seed supplier. Are they responsive to inquiries? Do they offer guidance or recommendations on growing elderberries from seeds? Good customer support can be invaluable, especially for beginners or those facing challenges during the growing process.
Remember, selecting reliable seed suppliers is crucial for a successful elderberry growing experience. Take the time to research and choose wisely to set yourself up for a rewarding and fruitful harvest.
Step 2: Preparing The Seeds For Planting
Preparing the seeds for planting is an essential step in growing elderberry from seeds. Ensure their viability by soaking them in water for 24 hours and then giving them cold stratification for 2-3 months before sowing.
Elderberries are versatile fruits that are rich in antioxidants and have a range of health benefits. If you’re eager to grow elderberry plants in your garden, starting from seeds can be an economical and fulfilling option. In this section, we will explore the second step in the process: preparing the seeds for planting.
Properly Cleaning And Prepping Elderberry Seeds:
To ensure the best germination rates and healthy seedlings, it is crucial to clean and prepare the elderberry seeds correctly. Follow these steps to get started:
- Gently remove the mature elderberries from the cluster.
- Place the berries in a bowl or container and fill it with water.
- Soak the berries for a few minutes to help separate the seeds from the pulp.
- Use your hands or a spoon to agitate the berries and loosen the pulp.
- Remove any floating or damaged seeds, as these are unlikely to germinate successfully.
- Drain the water from the bowl and rinse the seeds under running water.
- Spread the cleaned seeds onto a paper towel and let them air dry for a day.
Enhancing Germination Rates Through Scarification:
Some elderberry seeds may have hard outer shells that could hinder germination. Scarification is a technique that helps improve the germination rate by breaking through the seed coat. Here’s how to do it:
- Pour some hot water into a heat-resistant container.
- Place the elderberry seeds into the hot water and let them soak for 24 hours. This helps soften the seed coat.
- After soaking, carefully remove the seeds from the hot water.
- Use a fine-grit sandpaper or a nail file to gently rub the seed coat. This mechanical scarification helps create small openings in the hard shell, promoting moisture absorption and germination.
- Avoid excessive sanding, as it may damage the seed.
Remember, elderberries may take a while to germinate, so be patient and provide the ideal conditions for their growth. By properly cleaning and prepping the seeds, as well as employing scarification techniques, you can increase your chances of successful germination.
Stay tuned for the next steps in this exciting journey of growing elderberry plants from seeds.
Step 3: Germinating Elderberry Seeds
Germinating elderberry seeds is an essential step in growing elderberry from seeds. Follow this guide carefully to ensure successful germination and start your own elderberry plants.
Creating An Ideal Germination Environment
To successfully germinate elderberry seeds, it is important to create an ideal environment that encourages their growth. Here are some key factors to consider:
- Temperature: Elderberry seeds require a specific temperature range for germination. Aim for a constant temperature between 60 to 70 degrees fahrenheit (15 to 21 degrees celsius) to ensure optimal conditions.
- Moisture: Keeping the seeds moist is crucial during the germination process. Make sure to provide a consistently moist environment without soaking the seeds, as excessive moisture can lead to mold and rot.
- Light: While elderberry seeds do not require direct light to germinate, providing them with a light source can help stimulate growth. Consider using a germination mat or placing them in a well-lit area.
- Air circulation: Good air circulation is essential but avoid exposing the seeds to strong drafts. Provide a well-ventilated space to prevent the buildup of humidity.
- Germination tray or pot: Choose a tray or pot with good drainage to prevent excess moisture. Ensure that it is deep enough to accommodate the germination process without crowding the seeds.
Germination Techniques: Stratification And Warm Moist Stratification
Germinating elderberry seeds can be done using two main techniques: stratification and warm moist stratification. Here’s how each method works:
- Stratification: This technique involves subjecting the elderberry seeds to a cool, moist period to simulate the natural conditions they would experience in nature during winter. Here’s how to stratify elderberry seeds:
- Place the seeds in a moistened paper towel or bag.
- Seal the towel or bag and store it in the refrigerator for about 90 to 120 days.
- Check regularly to ensure the towel or bag remains moist.
- After the stratification period, remove the seeds and proceed to germination.
- Warm moist stratification: This method is an alternative to stratification and can help expedite the germination process. Here’s how to use warm moist stratification for elderberry seeds:
- Place the seeds in a container with warm water and soak them for 24 hours.
- After soaking, transfer the seeds to a moistened paper towel or bag.
- Seal the towel or bag and keep it in a warm location, such as near a heat source or on a germination mat.
- Maintain a consistent temperature between 70 to 80 degrees fahrenheit (21 to 27 degrees celsius).
- Check regularly to ensure the towel or bag remains moist.
- After about 30 to 45 days, remove the seeds from the warm moist stratification and proceed to germination.
By creating an ideal germination environment and utilizing the appropriate technique, you can increase the success rate of germinating elderberry seeds. Whether you choose stratification or warm moist stratification, be patient and consistent in providing the necessary conditions for optimal seed growth.
Step 4: Transplanting Elderberry Seedlings
Learn how to transplant elderberry seedlings effectively in step 4 of growing elderberry from seeds. This essential process ensures healthy growth for your elderberry plants.
Timing the transplantation for successful growth:
- It’s crucial to transplant elderberry seedlings at the right time for successful growth.
- Wait until the danger of frost has passed and the seedlings have developed a sturdy root system.
- Typically, this occurs in late spring or early summer, depending on your specific climate.
Choosing the right location for transplanting:
- Selecting the appropriate location plays a vital role in the success of transplanting elderberry seedlings.
- Consider the following factors when choosing a spot for your seedlings:
- Sunlight: Elderberries thrive in full sun, so choose a location with at least 6-8 hours of sunlight daily.
- Soil: The soil should be well-draining and rich in organic matter. Elderberries prefer a slightly acidic ph level between 5.5 and 6.5.
- Space: Ensure the area has enough space to accommodate the mature size of the elderberry plants, as they can reach heights of up to 10 feet.
- Proximity to other plants: Keep the seedlings away from other plants, as elderberries can be invasive and may compete for resources.
Transplanting process:
- Prepare the soil:
- Clear the area of any weeds or grass.
- Loosen the soil and remove any rocks or debris.
- Incorporate compost or well-rotted manure to improve soil fertility and drainage.
- Dig the holes:
- Make holes twice the width and depth of the seedling root balls.
- Space each hole at least 6 feet apart to allow for proper airflow and growth.
- Transplant the seedlings:
- Gently remove the seedlings from their containers, taking care not to damage the root system.
- Place each seedling in a hole, ensuring it is at the same depth as it was in the container.
- Backfill the hole with soil, firming it gently around the base of the seedling.
- Water thoroughly:
- After transplanting, water the seedlings generously to settle the soil and provide moisture to the roots.
- Continue to water regularly, especially during dry spells, to keep the soil evenly moist.
- Mulch and protect:
- Apply a layer of organic mulch around the base of the seedlings to suppress weeds, retain moisture, and regulate soil temperature.
- Install a protective barrier, such as a fence or netting, to shield the seedlings from animals or birds.
Remember, transplant shock is common, so closely monitor the seedlings for signs of stress and provide additional care if needed. With proper timing and a suitable location, your elderberry seedlings will have the best chance to grow and thrive in their new home.
Step 5: Caring For Elderberry Seedlings
Caring for elderberry seedlings is a crucial step in growing elderberry from seeds. By providing proper watering, adequate sunlight, and regular pruning, you can ensure healthy growth and a successful harvest.
Adequate Sunlight And Watering Requirements:
- Elderberry seedlings require at least 6 hours of direct sunlight each day to thrive. Place them in a location that receives ample sunlight to ensure their healthy growth.
- Ensure that the soil surrounding the seedlings remains consistently moist but not waterlogged. Overwatering can lead to root rot, so make sure to check the soil moisture regularly.
Protection From Pests And Diseases:
- To protect elderberry seedlings from pests, consider incorporating natural deterrents such as companion planting. Marigolds and garlic can help repel common pests like aphids and mites.
- Regularly inspect the seedlings for any signs of pests or diseases. Early detection allows for timely intervention and prevents any potential spread.
- Provide proper air circulation to prevent the development of fungal diseases. Avoid overcrowding the plants and maintain a gap between each seedling.
Remember, adequate sunlight and proper watering are essential for the healthy growth of elderberry seedlings. Additionally, safeguarding them from pests and diseases helps ensure their overall well-being. By following these care guidelines, you’ll be on your way to successfully growing elderberries from seeds.
Happy gardening!
Step 6: Nurturing Elderberry Plants To Maturity
Step 6: nurturing elderberry plants to maturity is an essential part of growing elderberry from seeds. Careful attention to watering, pruning, and protecting from pests will help these plants thrive and reach their full potential.
Once you have successfully grown elderberry plants from seeds, it’s essential to provide the proper care and attention to ensure their healthy growth and development. Nurturing elderberry plants involves several important aspects, including pruning techniques for stronger growth and fertilization and soil maintenance.
Let’s explore these steps in detail:
Pruning Techniques For Stronger Growth:
To encourage stronger growth and shape your elderberry plants, effective pruning techniques are vital. Consider the following tips:
- Prune during dormant season: It is best to prune elderberry plants during their dormant season, which is typically late autumn or early spring. This allows the plant to divert more energy towards new growth.
- Remove dead or damaged wood: Inspect the plant carefully and prune any dead or damaged wood. This helps maintain plant health and prevents the spread of diseases.
- Thin out crowded branches: Remove any excessive or overcrowded branches, allowing better air circulation and sunlight penetration throughout the plant.
- Train for an open-centered shape: Elderberry plants tend to develop an open-centered shape, which helps sunlight reach all parts of the plant. Prune the center branches more aggressively to achieve this growth habit.
- Encourage lateral growth: To promote lateral growth, selectively prune the top part of the branches, which encourages the plant to grow more bushy and vigorous.
- Regularly remove suckers: Elderberry plants tend to produce suckers, which are new shoots emerging from the base of the plant. Remove these suckers regularly to prevent competition for nutrients and maintain the desired shape.
Fertilization And Soil Maintenance:
Proper fertilization and soil maintenance are crucial to ensure your elderberry plants receive the essential nutrients they need. Consider the following guidelines:
- Apply organic matter: Incorporate organic matter such as compost or well-rotted manure into the soil before planting elderberries. This improves soil fertility and drainage while providing a steady release of nutrients.
- Mulch around the plants: Apply a layer of organic mulch, such as wood chips or straw, around the base of the plants. This helps conserve moisture, suppress weeds, and gradually enrich the soil with organic matter as it breaks down.
- Regularly test the soil: Perform periodic soil testing to assess the nutrient levels and ph of the soil. Adjust the soil ph if necessary to maintain a slightly acidic to neutral range of 6.0-7.5.
- Fertilize annually: In the spring, apply a balanced slow-release granular fertilizer specifically formulated for fruit-bearing plants. Follow the product instructions for proper application rates.
- Water properly: Ensure the plants receive adequate moisture, especially during dry periods. Water deeply and thoroughly, allowing the soil to dry out slightly between waterings to avoid overwatering.
By following these pruning techniques and practicing proper fertilization and soil maintenance, you can nurture your elderberry plants to maturity and enjoy a bountiful harvest of delicious and nutritious elderberries. Remember to provide regular care, and observe changes in the plants’ health and growth throughout the growing season.
Step 7: Harvesting Elderberries
Elderberry seeds can be successfully grown into mature plants by following step 7: harvesting elderberries. This crucial step allows you to collect the berries and continue the process of growing elderberry from seeds.
Recognizing The Signs Of Ripe Elderberries
Ripe elderberries are the key to a successful harvest. Knowing the signs of ripe elderberries will ensure that you pick them at their peak flavor and nutrient content. Here are some ways to recognize when your elderberries are ready to harvest:
- Color: Ripe elderberries are deep purple or black in color. They are no longer green or red. The berries should be uniformly colored, indicating that they are fully ripe.
- Texture: When you touch a ripe elderberry, it should be firm yet plump. Avoid berries that feel mushy or overly soft, as they may be overripe or spoiled.
- Clusters: Elderberries grow in clusters or umbels. Each cluster contains multiple berries. When the majority of berries in a cluster have turned the appropriate color, it’s a good indication that they are ready for harvest.
- Taste: If you’re unsure about the ripeness of your elderberries, taste one or two berries. Ripe elderberries should have a slightly sweet and tart flavor. If they taste bitter or sour, they may not be fully ripe.
Proper Techniques For Harvesting
Harvesting elderberries requires careful techniques to ensure the best quality and quantity of berries. Follow these tips for proper harvesting:
- Time of day: Harvest elderberries in the morning when the berries are cool and full of moisture. This will help preserve their freshness and prevent the berries from wilting.
- Tools: Use sharp scissors or pruning shears to cut the umbels of elderberries from the shrub. This method is gentle and prevents damage to the delicate berries.
- Selective picking: Harvest only ripe elderberries. Avoid picking unripe or green berries as they will not have fully developed their flavor and nutrients.
- Removing stems: Upon harvesting, remove the berries from the umbels by gently sliding your fingers along the stem. Discard any remaining stems and leaves as they are not edible.
- Storage: To maintain the freshness of your harvested elderberries, store them in a cool place or refrigerate them. Remember to consume or process the berries within a few days to prevent spoilage.
By following these tips for recognizing ripe elderberries and using proper harvesting techniques, you can enjoy a successful elderberry harvest. Remember to always be gentle when handling the berries to prevent bruising or damaging them. Happy harvesting!
Step 8: Processing And Using Elderberries
Step 8 in growing elderberry from seeds is processing and using the elderberries. Learn how to prepare and utilize the nutritious elderberries you have grown.
So you’ve successfully grown elderberry plants from seeds and now it’s time to reap the rewards of your hard work. Processing and using elderberries can be a delicious and enjoyable experience. Here are some tips on how to make the most of your elderberry harvest.
Various Culinary Uses Of Elderberries
- Elderberry jam: Turn your elderberries into a flavorful jam by simmering them with sugar and lemon juice. Spread it on toast or use it as a topping for pancakes and waffles.
- Elderberry pie: Create a scrumptious elderberry pie by combining the berries with sugar, cornstarch, and a pinch of cinnamon. Pour the mixture into a prepared pie crust and bake until golden and bubbling.
- Elderberry syrup: Make your own elderberry syrup by boiling the berries with water, sugar, and a touch of lemon zest. Strain the mixture and store it in a glass jar. Enjoy it as a topping for yogurt, pancakes, or ice cream, or mix it with sparkling water for a refreshing elderberry soda.
- Elderberry wine: If you’re feeling adventurous, try your hand at making elderberry wine. Crush the berries, add sugar and yeast, and let the mixture ferment for several weeks. Bottle it up and let it age for a few months for a delicious homemade wine.
- Elderberry tea: Steep dried elderberries in hot water for a soothing and aromatic tea. Add a touch of honey for sweetness and enjoy the numerous health benefits this herbal tea offers.
Tips For Storing Elderberries
- Refrigeration method: Place the harvested elderberries in a sealed container or plastic bag. Store them in the refrigerator where they can stay fresh for up to a week.
- Freezing method: Spread the elderberries in a single layer on a baking sheet and place it in the freezer until frozen. Transfer the frozen berries to a freezer bag or airtight container, and they will keep for up to a year.
- Drying method: Lay out the elderberries in a single layer on a tray or baking sheet. Allow them to dry in a cool, dark place for about a week or until they are leathery and no longer sticky. Store the dried elderberries in an airtight container in a dry and cool spot.
Now that you know how to process and use elderberries, you can indulge in their delightful flavors and reap the many benefits they offer. Whether you’re making jams, pies, or even wine, elderberries are a versatile ingredient that can elevate your culinary creations.
Harvest, process, and enjoy the abundance of this remarkable and nutritious fruit. Happy elderberry adventures!
Frequently Asked Questions For Grow Elderberry From Seeds
How Long Does It Take To Grow Elderberry From Seed?
Elderberry seeds can take a while to grow, typically requiring around 2 to 3 years. The seeds need a period of cold stratification before planting them, usually lasting for a few months. Once planted, the seeds take approximately 12 to 14 days to germinate.
It is important to note that growing elderberries from seeds can be slower compared to other propagation methods, such as cuttings or transplanting young seedlings. Elderberries are hardy plants and can tolerate a wide range of conditions, but they do prefer moist, well-drained soil and full sunlight.
Regular pruning can help stimulate growth and maintain the plant’s health. Remember to be patient when growing elderberries from seeds, as they require some time to establish and reach their full potential.
Is It Easy To Grow Elderberry From Seed?
Growing elderberry from seed is relatively easy. Start by scarifying the seeds to improve germination. Sow them in a well-draining potting mix, keeping it consistently moist. Maintain a temperature between 60-70°f (15-21°c) for optimal growth. Germination can take up to 2 months.
Once seedlings have developed several sets of leaves, transplant them into larger containers or directly into the ground. Elderberries prefer full sun but can tolerate some shade. Provide plenty of water, especially during dry spells. Prune the plants in late winter or early spring to promote branching and fruit production.
Elderberry plants generally reach maturity and bear fruit within 2-3 years. With proper care, you can enjoy a bountiful harvest of elderberries from seed-grown plants.
Do You Need 2 Elderberry Bushes To Get Fruit?
Yes, you need two elderberry bushes to get fruit. Elderberries are self-fertile but produce better yields when cross-pollinated by another bush.
Do Elderberry Seeds Need Scarification?
Elderberry seeds do not require scarification.
Conclusion
Growing elderberry from seeds can be a rewarding and beneficial experience. By following the proper steps, such as stratification, appropriate soil conditions, and sufficient sunlight, you can successfully germinate and cultivate elderberry plants. These versatile plants offer a multitude of health benefits, from boosting the immune system to providing antioxidants.
Moreover, elderberries can be used in various culinary creations, from jams and syrups to desserts and cocktails. As you embark on this journey, remember to have patience, as elderberry plants typically take a few years to mature and bear fruit.
With careful nurturing, you can enjoy a bountiful harvest of these delightful berries. So, why not give it a try and discover the joy of growing elderberry plants right in your own backyard? Happy gardening!